Things were looking relatively good until the contestants started to assemble their cakes. Both Jade and Thys struggled profusely with their chocolate mousse and passion cremeux, while Deena surprised half of Africa and himself by serving the judges a set gateau.
After the nail biting episode I had no choice but to accept the challenge. I had to find out for myself if this gateau was truly as challenging as it appeared to be. I downloaded the recipe from the Master Chef website and read through the ingredients and methods. It was nothing I haven't done before, so I was eagerly excited to attempt the task, even though most people I know would naturally give up just by looking at the two pages of intricacy.
I woke up early Saturday morning and head out to the grocery store. Once I had all my ingredients, I lined my cake tins and attempted every method and technique with great attention.
I started off with the chocolate mousse, even though the recipe calls for making the glacage first. I figured if Thys struggled so I should rather allow my mousse to set first. I then prepared the cocoa glacage and passionfruit cremeux followed by the Sâblée Croustillant and Hazelnut dacquoise.
I decided to add the recipe and give any tips that could help the average baker because I believe this is definitely something everyone should try. So here goes...don't be intimidated...the satisfaction afterwards is worth the effort. I did not have access to chocolate transfers so I made my own.

Passion Hazelnut Gateau
(Recipe provided by Master Chef SA)
Cocoa Glacage:
150 g Water
375 g Granulated Sugar
200 g Cream
200 g Glucose
120 g Cocoa Powder
18 g Gelatine (200 Blooms-Silver Strength)
105 g Water (for hydrating the gelatine)
125 g Cream
125 g Milk
50 g Castor Sugar
25 g Egg Yolks
250 g Passion Fruit Puree
50 g Glucose
280 g White Chocolate
8 g Gelatine
46 g water (for hydrating the gelatine)
46 g water (for hydrating the gelatine)
130 g Cake Flour
50 g Icing Sugar
75 g Butter
1 g Salt
15 g Almond Flour
25 g Egg (Beaten)
25 g Fleuilletine (can be replaced by crushed Corn Flakes)
250 g Hazelnuts, Toasted and Chopped
250 g Ground Almonds
126 g Icing Sugar (Sifted)
60 g Cake Flour
320 g Egg Whites
250 g Castor Sugar
100 g Egg Yolks
45 g Egg (Beaten)
68 g Granulated Sugar
55 g Water
338 g Whipped Cream
210 g Dark Chocolate 66%
80 g Milk 40%
80 g Milk 40%
1 Vanilla Pod
500 g White Chocolate
Cocoa Glacage:
 In a saucepan bring the water, sugar, glucose and cream to a boil.(Wet your hands with water when working with glucose - makes it more pliable).Hydrate the gelatine in the hydration water.Pour the hot liquid onto the cocoa while whisking.Pour back into the pot and bring the mixture to the boil and cook for 4 minutes, whisking continuously.Remove from the heat. Stir the softened gelatine into the cocoa mixture and blend well. Pour into a bowl and cover with plastic film-ensure that the plastic film touches the surface of the Glacage and let cool. Place on ice to rapidly cool and then refrigerate until needed.
On Glazing Gateau:
Gently heat half of the mixture to 49˚C then add the rest of the cool mixture.Pour the glaze into a jug.
Remove the cake from the freezer remove the acetate and place on a pouring rack.Pour the glaze from the middle moving outwards to coat the cake.
Passion Cremeux:
Heat the Cream and Milk together.Mix the Egg Yolk and Sugar together, pour the Cream onto it and return to the heat to thicken while constantly stirring.Heat the Passion Fruit Pulp and Glucose; hydrate the Gelatine and add.Mix the Puree and Custard and pour onto the chocolate.Mix as you do for a Ganache and finish the emulsion with an immersion blender. Pour into round insert mould till half way and reserve the remainder.Freeze until set.- minimum 20 minutes up to an hour.
Sâblée Croustillant:
Cream the butter and Icing Sugar, add the Salt.Add the Eggs slowly.Pulse in the Almond Flour and cake flour. Fold in the Fleuilletine.Rest for 20 minutes - pop into freezer to speed up process.Roll to 3mm and cut with the cake ring, bake at 175˚C until baked light golden brown for 10-15 minutes.
Set aside.
Hazelnut Dacquoise:
Weigh the Almonds, Icing sugar, Cake Flour and Hazelnuts into one bowl.Prepare a french Meringue with the Egg Whites and Castor Sugar.Fold the dry ingredients into the Meringue.Spread the mix into the square silicon frame.Bake at 160°C for 35 minutes, and then remove once cool enough to handle. Cut to size with the cake ring. Reserve.
Chocolate Mousse:Whip the Cream to medium peak and reserve.Cook the Water and Sugar to 121°C. Mix the Egg Yolks, Eggs and Vanilla together in the mixer with the whisk.Melt the Chocolate. Slowly pour the Syrup onto the Eggs while whisking, whisk till light and fluffy. Add a third of the cream to the chocolate- this forms a Ganache. Add the Ganache to the Egg Yolk mixture.
Fold in the rest of the Cream gently. Pour into a piping bag and reserve until needed.
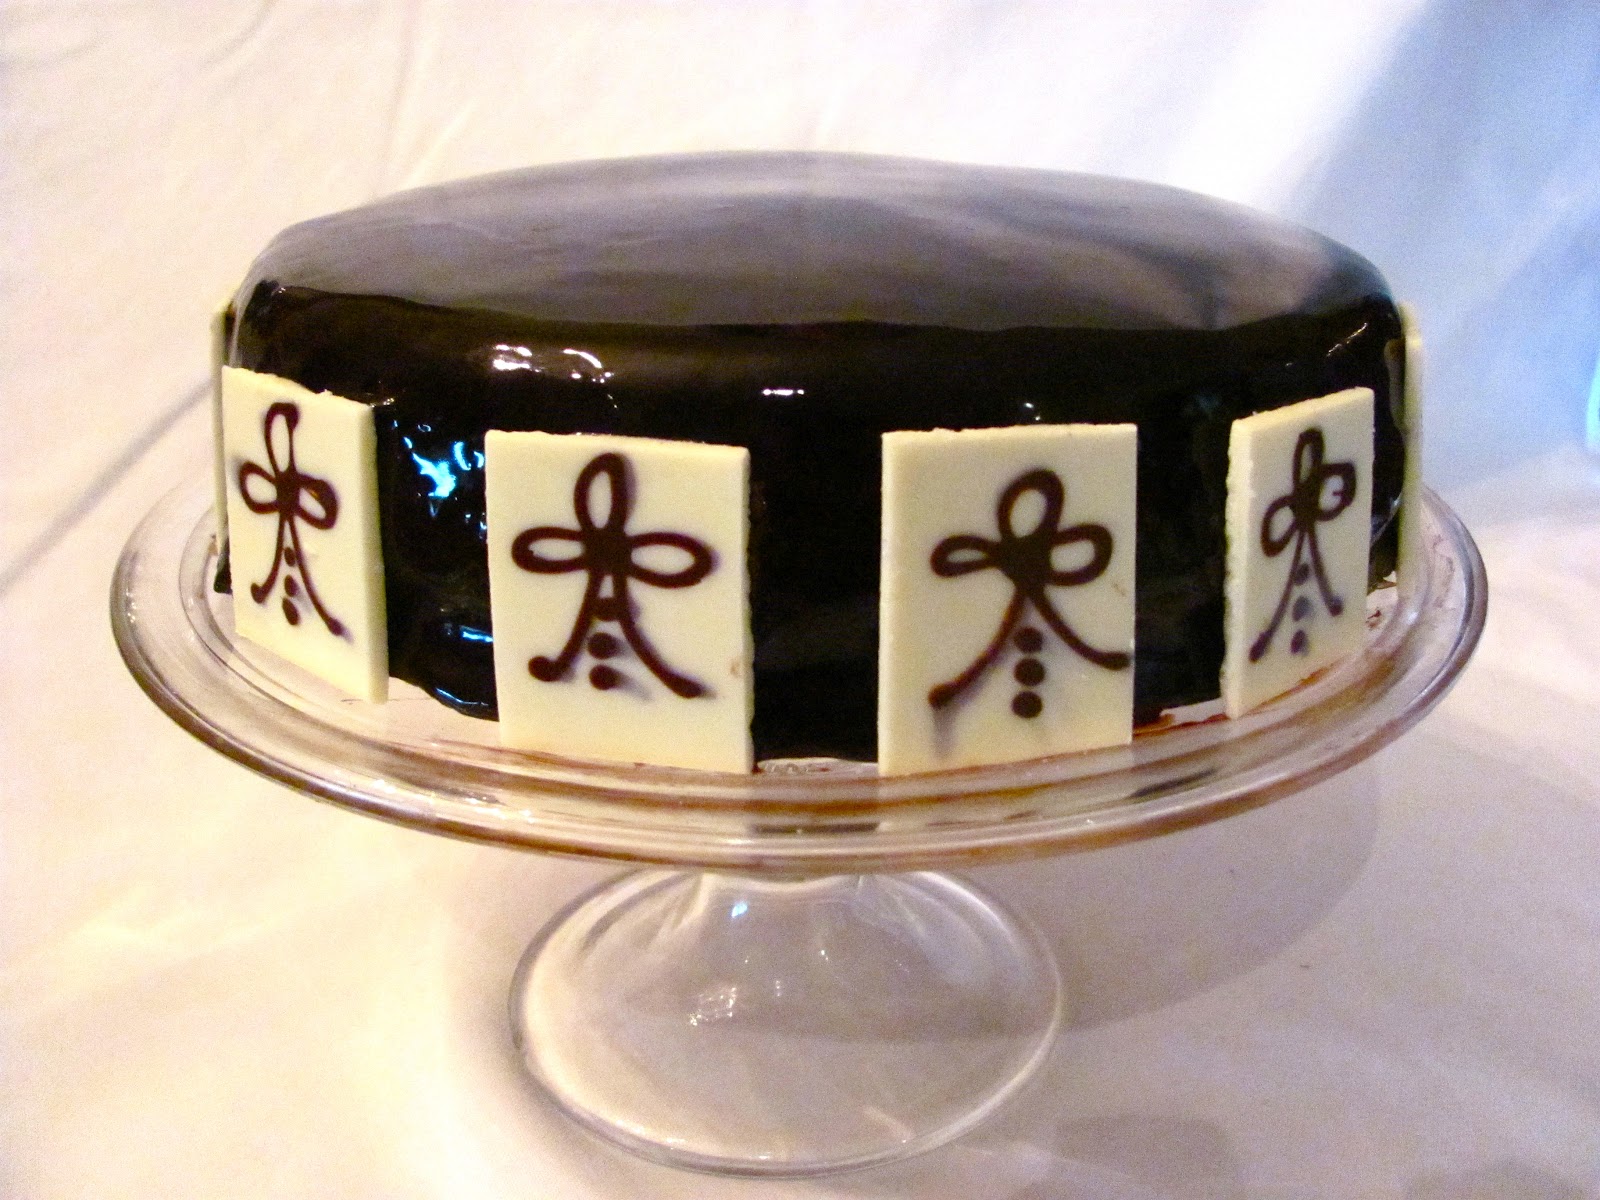
Chocolate Transfers:
Melt two thirds of the white chocolate over a Bain Marie till it reaches 48°C. Add the remainingchocolate, a little at a time until it reaches 27°C. Spread the chocolate evenly onto the transfer sheet and leave to set. Using a ruler cut into squares and reserve in fridge until needed. I you can't get hold of the transfers make your own like I did. Spread a thick layer of the melted chocolate over acetate. Allow to set and then cut into squares.
Assembly:
Line a 22 cm cake ring with acetate.Lay the Baked Pastry into the base, spread with 2 tablespoons Hazelnut Paste and then lay the Dacquoise on top.Pipe a spiral of the Chocolate Mousse onto the Dacquoise that is a double layer around the edge.With a small spatula pull the mousse up the side of the ring to ensure a smooth edge. Place the Passion Fruit Cremeux on top of the Mousse.Pipe the rest of the chocolate mousse into the ring and level off.Blast chill to set – 20 minutes minimum. This is a good time to make the tiles.Coat the gateau with warmed Gelée and place in the fridge to set for up to an hour. (Make sure your mousse is properly set before you coat, to prevent melting).Melt some White chocolate and with a paper cone pipe décor on the left side of the cake.Transfer the cake to the serving plate carefully. Space the chocolate tiles around the base of the cake evenly. Decorate with pearls, gold leaf and half Hazelnuts.


The proof of the pudding is in the eating...
I served the Gateau today for Father's Day and it fortunately met everyone's expectations including mine. Cutting through the end product, I experienced so much excitement. Every layer was perfectly placed and I too could see my reflection! The rich chocolate mousse is complimented by the slight acidity of the passion cremeux, while the crispy pastry and nutty meringue adds to the variation of texture. Delicious! I once again realised how passionate I am about baking and receiving positive feedback makes every minute in the kitchen worth it.
This Gateau is a triumph for Pastry Chefs. It shows how technical and intricate pastry is. It is a specialisation and not just a few ingredients "banged" together. I am reminded by the poster in the Pastry Kitchen at Culinary School:
PRECISION + PATIENTS + PERFECTION + PERSISTANCE = PASTRY