Monday, 25 June 2012

Rose water and Pistachios


This past weekend was typical duvet snuggling and red wine weather. I am missing the sun and heat terribly and decided to bring a touch of pink into my life! I therefore decided to bake a few Rose water and Pistachio Cupcakes to brighten my day!

I got the basic recipe from the Hummingbrid Bakery and pimped it up with a hint of pink deliciousness!!

Rose Water and Pistachio Cupcakes

Cupcakes:
120 g Cake Flour
140 g Castor Sugar
7,5 ml Baking Powder
Pinch of Salt
40 g Unsalted butter, room temperature
120 ml Milk
1 Egg
2,5 ml Vanilla Extract
30 ml Rose water
2,5 ml red food colouring
1/3 cup Pistachios, finely chopped

Meringue Frosting:
2 Egg whites
165 g Castor Sugar
2,5 ml Vanilla Paste
15 ml red food colouring
15 ml Rose water

Rose Petal Plum Jelly:
6 cups of strained plum liquid
6 cups sugar
6 lavender sprigs
45 ml port
10 ml Rose water
12 to 15 rose petals

 Directions:
Preheat the oven to 170C.  Line a 12-holemuffin tin with paper cases. Mix the flour, sugar, baking powder, salt and butter in a medium size bowl and beat with an electric mixer on low speed until you get a sandy consistency, and everything is combined. Gradually pour in half of the milk and beat until the milk is just incorporated. Whisk the egg, vanilla extract, remaining milk, red food colouring and rose water together and add to the flour mixture. Continue mixing until the mixture is smooth. Do not over mix. Add the chopped pistachios. Spoon the mixture into the paper cases until two thirds full and bake for 20-25 minutes or until light and golden. A skewer inserted in he centre should come out clean. Allow the cupcakes to cool slightly in the tray before turning out on to a wire cooling rack.

Meringue Frosting:
Place the egg whites and sugar in a bowl and cook over a double boiler until the sugar hasdissolved.
Beat the mixture with an electric mixer until stiff peaks. Add the vanilla extract, red food colouring and Rose water. Spoon into a piping bag.

Rose Petal Plum Jelly:
Mix the plum liquid and the sugar in a large pot, stirring occasionally over low heat until dissolved.
Add the lavender sprigs and turn up the heat. Boil, stirring occasionally, until the mixture reaches gelling point (105C). Remove from the heat and add the port and Rose water. Place in sterilized bottles and top each with a rose petal. Use a skewer to push the rose petal under the surface of the jelly and seal.

Assemble:
Cut a circle on the top of each cupcake and remove a bit of the sponge.  Spoon half a teaspoon of the Rose Petal Plum Jelly inside. Top with the circle cut out. Pipe the Meringue Icing in a spiral movement on top of the cupcake.  Top with pink fondant roses and sprinkle with pistachio dust.

I made my own fondant roses, but they can be purchased at any baking shop. If you don't have the time to make the Rose Petal Jelly, it can be replace by strawberry jam.

Tea time!!!

Sunday, 17 June 2012

Master Chef takes the cake!


Episode 12 of Master Chef South Africa definitely kept me on edge.  The Pressure Test was a three hour nightmare, in that the three finalists had to bake and make a Passion Hazelnut Gateau, created by Pastry Chef Lorraine Meaney from the Cape Grace hotel in Cape Town. The three finalists tasted her gateau, praising its beauty and amazed that ‘one can see one’s reflection in the cake’. Chef Lorraine explained that the gateau had a pastry base, with layers of hazelnut dacquoise, chocolate mousse, passion fruit cremeux, covered with a chocolate glacage.  She told the finalists that a successful gateau lies in its timing, the accuracy in weighing the ingredients, and the technique in making the different elements.


Things were looking relatively good until the contestants started to assemble their cakes. Both Jade and Thys struggled profusely with their chocolate mousse and passion cremeux, while Deena surprised half of Africa and himself by serving the judges a set gateau. 


After the nail biting episode I had no choice but to accept the challenge. I had to find out for myself if this gateau was truly as challenging as it appeared to be. I downloaded the recipe from the Master Chef website and read through the ingredients and methods. It was nothing I haven't done before, so I was eagerly excited to attempt the task, even though most people I know would naturally give up just by looking at the two pages of intricacy. 


I woke up early Saturday morning and head out to the grocery store. Once I had all my ingredients, I lined my cake tins and attempted every method and technique with great attention. 
I started off with the chocolate mousse, even though the recipe calls for making the glacage first. I figured if Thys struggled so I should rather allow my mousse to set first. I then prepared the cocoa glacage and passionfruit cremeux followed by the Sâblée Croustillant and Hazelnut dacquoise.


I decided to add the recipe and give any tips that could help the average baker because I believe this is definitely something everyone should try. So here goes...don't be intimidated...the satisfaction afterwards is worth the effort. I did not have access to chocolate transfers so I made my own.


Passion Hazelnut Gateau   
(Recipe provided by Master Chef SA)


Cocoa Glacage:

150 g Water
375 g Granulated Sugar
200 g Cream
200 g Glucose
120 g Cocoa Powder
18 g Gelatine (200 Blooms-Silver Strength)
105 g Water (for hydrating the gelatine)

Passion Cremeux:
125 g Cream 
125 g Milk
50 g Castor Sugar
25 g Egg Yolks
250 g Passion Fruit Puree
50 g Glucose
280 g White Chocolate
8 g Gelatine
46 g water (for hydrating the gelatine)

Sâblée Croustillant:
130 g Cake Flour 
50 g Icing Sugar
75 g Butter
1 g Salt
15 g Almond Flour
25 g Egg (Beaten)
25 g Fleuilletine (can be replaced  by crushed  Corn Flakes)

Hazelnut Dacquoise:
250 g Hazelnuts, Toasted and Chopped 
250 g Ground Almonds
126 g Icing Sugar (Sifted)
60 g Cake Flour
320 g Egg Whites
250 g Castor Sugar

Douceur Intense - Buche (chocolate mousse):
100 g Egg Yolks 
45 g Egg (Beaten)
68 g Granulated Sugar
55 g Water
338 g Whipped Cream
210 g Dark Chocolate 66%
80 g Milk 40%
Vanilla Pod

Chocolate Transfers:
500 g White Chocolate 
Transfer Sheet

Cocoa Glacage:
In a saucepan bring the water, sugar, glucose and cream to a boil.(Wet your hands with water when working with glucose - makes it more pliable).Hydrate the gelatine in the hydration water.Pour the hot liquid onto the cocoa while whisking.Pour back into the pot and bring the mixture to the boil and cook for 4 minutes, whisking continuously.Remove from the heat.  Stir the softened gelatine into the cocoa mixture and blend well.  Pour into a bowl and cover with plastic film-ensure that the plastic film touches the surface of the Glacage and let cool.  Place on ice to rapidly cool and then refrigerate until needed.

On Glazing Gateau:
Gently heat half of the mixture to 49˚C then add the rest of the cool mixture.Pour the glaze into a jug.
Remove the cake from the freezer remove the acetate and place on a pouring rack.Pour the glaze from the middle moving outwards to coat the cake.

Passion Cremeux:
Heat the Cream and Milk together.Mix the Egg Yolk and Sugar together, pour the Cream onto it and return to the heat to thicken while constantly stirring.Heat the Passion Fruit Pulp and Glucose; hydrate the Gelatine and add.Mix the Puree and Custard and pour onto the chocolate.Mix as you do for a Ganache and finish the emulsion with an immersion blender. Pour into round insert mould till half way and reserve the remainder.Freeze until set.- minimum 20 minutes up to an hour.


Sâblée Croustillant:
Cream the butter and Icing Sugar, add the Salt.Add the Eggs slowly.Pulse in the Almond Flour and cake flour. Fold in the Fleuilletine.Rest for 20 minutes - pop into freezer to speed up process.Roll to 3mm and cut with the cake ring, bake at 175˚C until baked light golden brown for 10-15 minutes. 
Set aside.

Hazelnut Dacquoise:
Weigh the Almonds, Icing sugar, Cake Flour and Hazelnuts into one bowl.Prepare a french Meringue with the Egg Whites and Castor Sugar.Fold the dry ingredients into the Meringue.Spread the mix into the square silicon frame.Bake at 160°C for 35 minutes, and then remove once cool enough to handle.  Cut to size with the cake ring.  Reserve.

Chocolate Mousse:Whip the Cream to medium peak and reserve.Cook the Water and Sugar to 121°C.  Mix the Egg Yolks, Eggs and Vanilla together in the mixer with the whisk.Melt the Chocolate. Slowly pour the Syrup onto the Eggs while whisking, whisk till light and fluffy. Add a third of the cream to the chocolate- this forms a Ganache. Add the Ganache to the Egg Yolk mixture.
Fold in the rest of the Cream gently. Pour into a piping bag and reserve until needed.

Chocolate Transfers:
Melt two thirds of the white chocolate over a Bain Marie till it reaches 48
°C. Add the remaining
chocolate, a little at a time until it reaches 27°C. Spread the chocolate evenly onto the transfer sheet and leave to set. Using a ruler cut into squares and reserve in fridge until needed. I you can't get hold of the transfers make your own like I did. Spread a thick layer of the melted chocolate over acetate. Allow to set and then cut into squares.


Assembly:
Line a 22 cm cake ring with acetate.Lay the Baked Pastry into the base, spread with 2 tablespoons Hazelnut Paste and then lay the Dacquoise on top.Pipe a spiral of the Chocolate Mousse onto the Dacquoise that is a double layer around the edge.With a small spatula pull the mousse up the side of the ring to ensure a smooth edge. Place the Passion Fruit Cremeux on top of the Mousse.Pipe the rest of the chocolate mousse into the ring and level off.Blast chill to set – 20 minutes minimum. This is a good time to make the tiles.Coat the gateau with warmed Gelée and place in the fridge to set for up to an hour. (Make sure your mousse is properly set before you coat, to prevent melting).Melt some White chocolate and with a paper cone pipe décor on the left side of the cake.Transfer the cake to the serving plate carefully.  Space the chocolate tiles around the base of the cake evenly. Decorate with pearls, gold leaf and half Hazelnuts.


The proof of the pudding is in the eating...

I served the Gateau today for Father's Day and it fortunately met everyone's expectations including mine.  Cutting through the end product, I experienced so much excitement. Every layer was perfectly placed and I too could see my reflection! The rich chocolate mousse is complimented by the slight acidity of the passion cremeux, while the crispy pastry and nutty meringue adds to the variation of texture. Delicious! I once again realised how passionate I am about baking and receiving positive feedback makes every minute in the kitchen worth it. 

This Gateau is a triumph for Pastry Chefs. It shows how technical and intricate pastry is. It is a specialisation and not just a few ingredients "banged" together.  I am reminded by the poster in the Pastry Kitchen at Culinary School:

PRECISION + PATIENTS + PERFECTION + PERSISTANCE = PASTRY


Wednesday, 6 June 2012

Culinary Bucket List

Like many people that have crossed the invisible threshold that separates thinking you'll live forever from reality of yes, I am going to die one day too, I have a bucket-list, but mine is somewhat different to the average person who writes down everything they want to do before they kick the bucket. Mine is populated only with food, therefore I call it my Culinary bucket list.

My culinary bucket list is more of a dream catcher than a pressure-laden to-do-list, at least that is what I tell myself. It's rife with classics like koeksisters, perfecting croissants, baked Alaska cake, a gigantic croquembouche, wedding cakes and of course to perfect that little macaron! And no, not the coconut confections you often see dipped in chocolate - the macaroons. I'm referring to the macarons, the single "o" meringue sandwich cookies that nearly every baking and pastry blog has an entry for. Adding to the confusion surrounding these equally delicious, sweet treats is that the English translation for French macaron, is, you guessed it, macaroon.

The first time I made macarons, was when I was the pastry chef at La Colombe in my 3rd year of Culinary school. Every table would receive a platter of petit fours after their meal. We usually made Turkish delight, chocolate fudge and chocolate salted caramel  truffles. Avoiding the monotonous routine, I decided to include pistachio macorons to the list. My first batch was not as successful until Chef Luke advised me to rest them for 15 minutes before baking. The second batch was perfect, they had all the characteristics of a great macaron. I was so chuffed with myself.

With only a few, simple ingredients and endless options for flavourings and fillings, these dainty confections are right up my alley. For every lovely photo of "The Perfect Macaron" you can find on the Internet, you can find a horror story of macarons gone wrong. Every time I have baked a batch it came out perfect, only until I returned from London, and my mom asked me to show her how to bake them. To my detriment, I also now have empathy with those who told their stories of "Macarons gone wrong". At first I blamed the oven, then the almond flour, but when I ran out of things to blame, I realised mybe I had lost my perfect baking ability.

So now I am on my quest to perfect the macaron. I have collected recipes, methods and techniques as if I was working on a thesis. I bought a pastry nozzle just for the macaron making. I have saved egg whites. These are for macarons I'd boldly announce as I stashed them in the back of the fridge. All the while, I continued bookmarking food magazines and stuffing my macaron file with pictures and recipes.

So today, I picked up the container of egg whites in the fridge so I could get at my tub of yogurt. I held the little covered bowl in the palm of my hand and stared at it. What if I could let go of the perfect macaron. And just make the damn thing. A voice in my head cried, "Just do it!" I set the container on the counter and instinctively reached for my folder. Operation Macaron was officially underway. I spread the papers out in front of me creating a sea of  "stiff-peaks, firm peaks, 160 C, 180 C, let them rest for 10-15 minutes, let them rest for a hour, bake them as soon as you pipe them, don't make them when it rains, age the egg whites, use only room temperature eggs, no wait use them cold..." My head was spinning. I didn't want to synthesise best practises. I wanted to bake. And I wanted to bake macarons, perfect or otherwise.

I put the folder back on the bookcase and pulled down one of my faithful baking books from Culinary school. I turned right to the macaron page. I grabbed my Silpats and preheated the oven to 160C. Allow Operation macaron to commence. Ninety minutes later I hovered over my macarons, beaming with pride. Mine looked nothing like the ones I have stared at in patisseries in France, but they were indeed wonderfully tasty. Bucket list in hand, I took the cap off my black marker and smugly put a bold line through "macarons".


Peanut butter & Chocolate macarons:


60 g ground almonds
125 g icing sugar
60 g egg whites
25g granulated sugar
2.5 ml vanilla extract


Filling:
30 ml peanut butter, crunchy or smooth
100 g dark chocolate, finely chopped
125 ml cream


Process the almonds and icing sugar in a food processor for 5 minutes. Sift into a bowl. Whip the egg whites to soft peaks. Add the granulated sugar gradually and whip to stiff, glossy peaks. Fold in the dry ingredients and the vanilla into the egg whites, adding the dry ingredients a third at a time. Using a plain tip, deposit the mix on parchment paper or Silpats in mounds the size of a R5. Allow to stand for 30 minutes. Bake at 160C until golden and well risen. Remove from the oven and allow to cool. Remove from the paper and sandwich with the peanut butter and chocolate filling.
For the filling: Heat the cream until boiling point. Pour over the chopped chocolate adn mix in the peanut butter. Mix well together and chill in refrigerator.


Monday, 4 June 2012

Vogelgat Nature Reserve


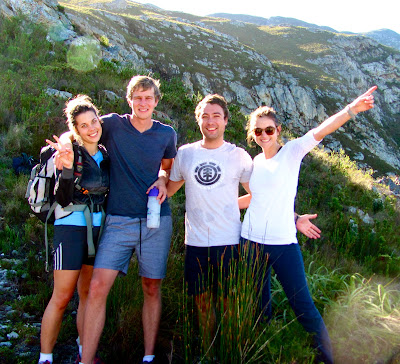
Vogelgat is a private nature reserve in Hermanus, with a limited amount of members. It constitutes 35km of breathtaking hiking trials, waterfalls, plunge pools and majestic gorges and green rolling Cape Fold mountains. Overnight huts are hidden from each 
other to provide the hiker with an extended stay in which to 
rejuvenate his spirit and become one with nature. All the huts are fully equipped with gas cookers, cutlery,crockery,candles and bunk beds.Therefore all you need is your sleeping bag, warm clothes, 
food and do not forget the red wine,to equip you through the night.


.


It was quite misty and humid whilst going up, and my back-pack was rather large so I got a good work out. It took us 2 hours to get to our hut - Leopard Camp.


We heated chorizo and black bean soup over the gas cooker and enjoyed it with freshly baked ciabatta and a bottle of Spier Pinotage, and once all the wine had been polished we turned to the old faithful Amarula to heat our tummies before bed!

It was a beautiful sunshine day the next morning and the walk back was much more visible.


A great hike with Liezani, Stephan and Dawid!!!


Chorizo and Black bean soup

150g chorizo cooking sausage
2 spring onions
½ tsp ground cumin
425g tin black beans, rinsed and drained
1 fresh tomato, roughly chopped
500ml chicken stock 
1 lime, juice only
2-4 tbsp chopped, fresh coriander

Slice the chorizo sausage into slices. Place the chorizo pieces into a large saucepan over a medium heat and cook over a medium heat for five minutes, or until they start to become crisp. Remove the chorizo with a slotted spoon and drain on kitchen paper. Slice off the green parts of the spring onions and finely slice them. Set the green parts of the spring onions aside.Finely slice the white part of the spring onions and add the pieces to the frying pan the chorizo was cooked in. Add the ground cumin to the pan, and cook over a gentle heat for two minutes, stirring the mixture. Add the black beans, tomato and the chicken stock. Stir the mixture in the pan and simmer for ten minutes. Add the chorizo pieces and the finely chopped green spring onions. Add some lime juice, to taste, and garnish with chopped coriander.